This past Sunday was my "surprise" bridal shower. I say this in quotes because my beloved mom-in-law tried so hard to keep it quiet and have me be totally surprised...it didn't happen. There were a few dropped hints along the way. Sorry Mrs. C! I do thank her for going above and beyond to make everything so wonderful.
Even though I knew what was coming, walking into that room was still completely shocking. When you see all these people you love, that love your hubby, and family and friends that usually don't get to mix, you truly feel blessed and humbled that they would be there.
I actually had a mini panic attack a few days prior worried about what I would eat at said event. (As a vegan, your love of life and the animals comes with a price!) I was taken care of and even had my own cake from my fave bakery here in New Jersey - Papa Ganache. So freakin' good, not only is it all vegan, it knocks the socks off ANY bakery vegan or non that I've ever eaten from.
The gifts were creative and touching and perfect and some embarrassing! I wish I had the ability to take a picture with each person who gave us something. It would have been nice since there were some new faces and people I have heard so much about that I'd just met for the first time.
Sadly, I was in the pics and didn't really get to take many. I will post some later on as they come in! Is there anything better than a party where all the gifts are for you?

Wednesday, March 30, 2011
Tuesday, March 22, 2011
Wedding Tutorial: Monograms (easy)
Here is a simple project that I am using for my own wedding with the favor boxes. If you have tons of labels lying around, this is a nice way to incorporate them at no expense to you!
You will need:
labels
computer and printer
decorative hole punch
Go into your word processing program. I use Microsoft Word. Under Tools, click on Labels and be sure that you select the correct code for the labels that you have. Decide on what font you want to use. If you want more variation than the fonts you already have, go to a site that lets you download fonts for free. I like Dafont.com. You can also download cool symbols as well that you can use like butterflies and beach themed shapes for whatever your celebration might be.
I have chosen to just use the "C" in the wedding colors of red and teal.

Once you have selected your font and made your labels, print them out.

Here, to punch out the monogram, I am using a circle punch with a diameter of 1 inch.


Once, you are done, affix to the box and you are done!

Now, you can get even more complicated with this by adding other embellishments. For me, I wanted to keep it clean and simple. ( I have a lot of these little buggers to do!)
Sunday, March 20, 2011
My Store
This is my Etsy store started only a few months ago. Getting an internet based business off the ground is truly hard work! It has been a roller coaster and some days I am up, and other days...not so up.
I definitely feel envy from people who have just one passion or interest screaming their name. I feel sometimes like I have multiple personalities and each one has a different craft or medium or idea and EVERYONE wants to be heard! In time the store will find it's voice.
For now, I have a lot to do to refine it so that the voices can calm down! I do have favorites in the store and sometimes feel like a "bad mom" for not giving the other babies the same love and attention! I wonder if other Etsy artists feel the same or I'm just crazy...
Here are some of my likes...


What do you think? Am I just schizo or do they all work somehow? Helpful comments are ALWAYS welcome!
I definitely feel envy from people who have just one passion or interest screaming their name. I feel sometimes like I have multiple personalities and each one has a different craft or medium or idea and EVERYONE wants to be heard! In time the store will find it's voice.
For now, I have a lot to do to refine it so that the voices can calm down! I do have favorites in the store and sometimes feel like a "bad mom" for not giving the other babies the same love and attention! I wonder if other Etsy artists feel the same or I'm just crazy...
Here are some of my likes...


The bookmarks are based on my art, I love single fluid lines...


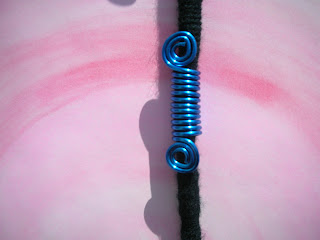
These two are lock charms that can be worked into your hair for a dangling design!

These are my "get 'em talking" wine charms...Fun, no?


These are some of my polymer clay creations....


This is another item based off my artwork, in hammered copper wire...

My "works of art" wine charms...
New York City Vegetarian Food Festival!
I am so excited there is going to be a veg fest of sorts in New York City next month! There are events like crazy on the west coast and quite a few in Philly and Boston, I think, but it is nice to have one so close to home. Check out the website(click on the title post above). It is going to be on April 3, and I will so be there!
I am going to be selling items from my Forever Always Amber Etsy store, with a focus on the vegan/veg related items. Even if you are not veg and would never consider going veg (like I once thought 2 years ago), if you are in the area and can check it out, do so! You are sure to be surprised, and your tastebuds will definitely thank you. I GAH-RUN-TEE! Come by and say "hi!" I'll be at the The Vegan Guide to NYC table with my hubby to be.
It will run from 10am to 6pm at:
The Altman Building
135 West 18th Street (Between 6th and 7th Avenues)
New York City
Friday, March 18, 2011
Playing with Glass...Part 4
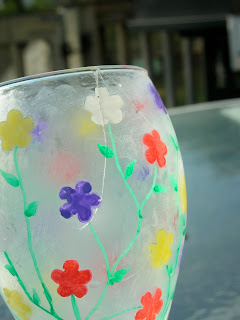
Well, it is done. I have completed my etched/painted glass experiment. The final step was to see if the glass could hold up to washing. It did! I was so excited to take the pictures to show here. So excited, but now my experiment has ended in tragedy.
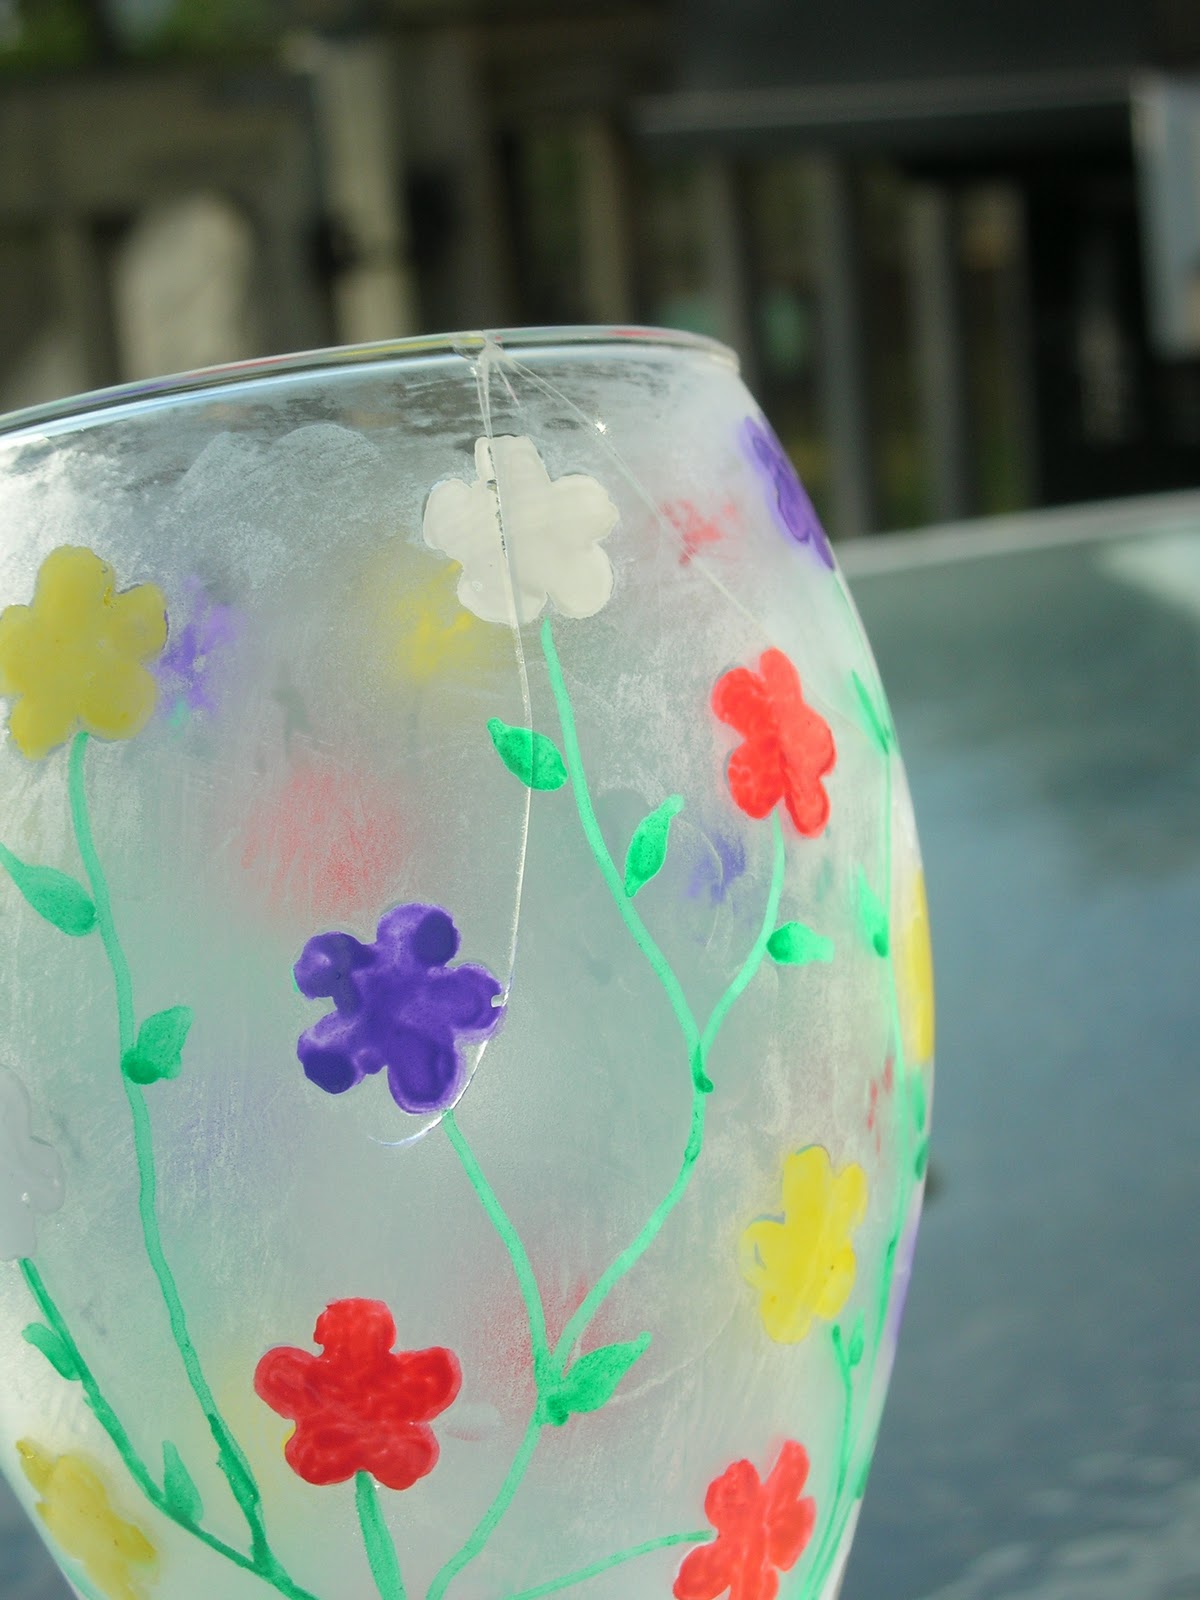
As I was taking pictures of the finished product, a gust of wind blew the book it was sitting on, and to save it, the hand with the camera came up to crash into it! Sigh... see if you can see the massive 3 way CRACK in the glass!


 About 1 minute after the incident. (I was in shock when it cracked so I was staring in disbelief for a moment or two!)


As I was taking pictures of the finished product, a gust of wind blew the book it was sitting on, and to save it, the hand with the camera came up to crash into it! Sigh... see if you can see the massive 3 way CRACK in the glass!

There she is! My beautiful idea come to life!

This is my baby about 30 seconds after "the incident..."

...10 seconds before "the incident."

Oh, it still hurts to look at.
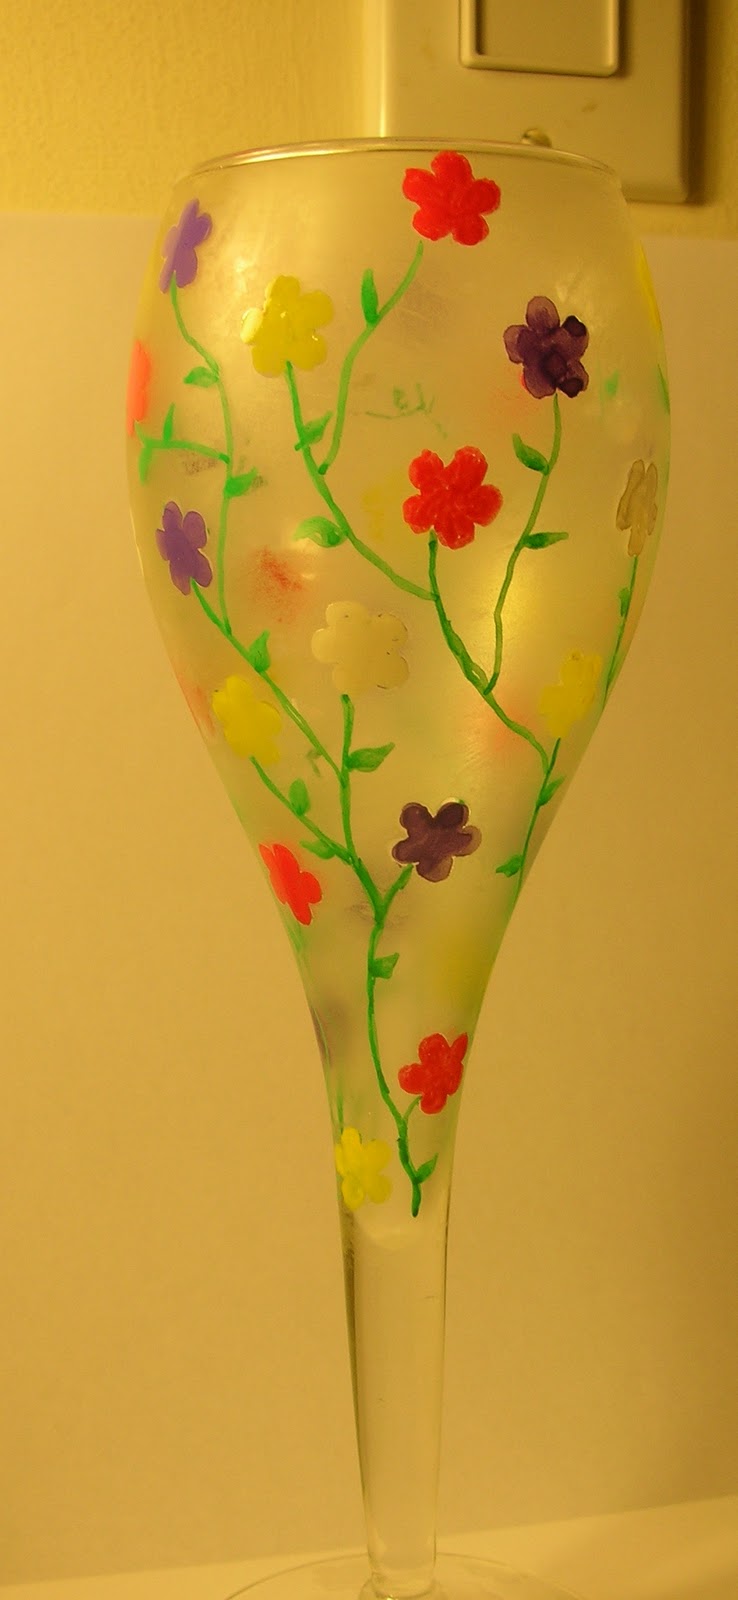
I don't know if you can really see from the pic, but the base of the glass has the reverse etching and the flowers themselves were what got the frosted effect.


My wine charms, recreated famous works of art available in my Etsy store, are featured on the bottom.


And to be a drama queen, to show the full circle of "life," here is my glass, laid to rest. So young, gone before her time... she never even got to fulfill her purpose of carrying a good wine...(sigh).

Thursday, March 17, 2011
Playing with Glass...Part 3
Okay. I have gotten this far with the glass. It's has been etched. It has been painted/decorated. And it has now been through the oven to be heat sealed!
I was nervous about putting a glass in the oven, but it had to be done. Although the Deco Color pens didn't give these specific directions, all other companies I researched based on their glass painting products recommended putting the item in the oven at about 325 for at least 40 minutes.
I put the wine glass on a cookie tray with a small sheet of foil on it. Then when the oven was ready, I placed the tray in the oven for about thirty minutes, then turned off the oven and left the glass there for about 4 hours to really set and COMPLETELY cool.
It looks good. Although I did not want to use the medium tipped marker on this project and mainly used fine tips, the medium tip made my flowers look really good. There were no visible drawing lines with it like the ones the fine tipped markers left behind.
I will give the glass a test of a few hand washes and see how it holds up. (I might even be so daring as to put it in the dishwasher for a true experiment!) I will post the results tomorrow.
Free DIY Wedding Invites
As a budding graphic designer who did her own invitations... (crazy, YES! -- worth it? YES, YES, YES!) Anywhoo, one of the things I wanted to do was try and share my invite with others. The basics have been left out for you to fill in as necessary.
As I am not sure how it will look right now, I will post just the invite. If I get requests for more, I will post the coordinating bottle tags, bottle labels, mailing labels and RSVPs too. This was for a message in a bottle wedding invitation, so if anyone is having a destination or beach wedding, this might be for you!
There are some crafty tutorials on the web but I am more that willing to post my winning tutorial here! So here is the basic invite:

The font was Baroque Script. I've not worked out how to make this an editable download so if you like it or want something similar, email me and let me know!
What do yo think?
Wednesday, March 16, 2011
Playing with Glass...Part 2
Okay, here is the second part of the project. I went to the Crafster site yesterday and saw a cute Crafty Quickie video (I think that's what they call them) about glass etching. I wish I'd known about keeping the cream moving in one direction. Oh well, at least I know for next time.
Now on to the second part of the project... I took my Marvy Deco Color pens and colored in the spots that were covered by the Frog Tape punch outs. You need a steady hand and you literally color "in the lines" of the glass. If you make a mistake and slip out on to the frosted glass, quickly wipe with a q-tip or even your fingernail.
Once I finished coloring in the flowers, I then went on to draw vines connecting all the flowers together and flowing to the base of the glass where the liquid would start. The vines were drawn on the treated glass, what has now been frosted. I am thinking about adding brown for a thicker trunk on the stem of the glass. Right now, I am pretty pleased with the outcome.
I am not sure if these need to be baked to set in the inks or if they have to remain simply decorative and not for use, or just have to be hand washed rather than being dumped in the dishwasher. There is no info on that on the Marvy site. You know what that means... more experimenting!
Here are shots of the project up to this point...


 Ta-dah!
Now on to the second part of the project... I took my Marvy Deco Color pens and colored in the spots that were covered by the Frog Tape punch outs. You need a steady hand and you literally color "in the lines" of the glass. If you make a mistake and slip out on to the frosted glass, quickly wipe with a q-tip or even your fingernail.
Once I finished coloring in the flowers, I then went on to draw vines connecting all the flowers together and flowing to the base of the glass where the liquid would start. The vines were drawn on the treated glass, what has now been frosted. I am thinking about adding brown for a thicker trunk on the stem of the glass. Right now, I am pretty pleased with the outcome.
I am not sure if these need to be baked to set in the inks or if they have to remain simply decorative and not for use, or just have to be hand washed rather than being dumped in the dishwasher. There is no info on that on the Marvy site. You know what that means... more experimenting!
Here are shots of the project up to this point...


Tuesday, March 15, 2011
Playing With Glass...Part 1
Okay. This is my first tutorial. A somewhat permanent record of this project. I bought a glass etching kit a while back and never used it. The thought of how caustic that concoction is and my lack of coordination at times made me nervous. I had to use it because the creative juices were screaming ideas - that and the fact that I could no longer return the darned thing because I'd kept it too long - so I dove in yesterday.
Here is what you need to do this project (I think, since I haven't actually completed it yet!):
Frog Tape (painter's tape found in home improvement stores)
paper towel
paper punch
Armor Etch
gloves
paintbrush
glasses
Marvy Deco Color permanent inks
Okay. So I came up with the idea to punch out some flower shapes from the tape. It is time consuming and towards the end, the hole punch got stuck so this idea only works with a hole punch you may not mind losing or was "borrowed" from a scrapbooking buddy you don't see anymore! ; ) I'll see if WD40 helps unstick my hole punch later.
Next, I washed and thoroughly dried the glass with paper towel, and then applied the flower cutouts randomly around the glass.
Put paper towel or newspaper around your work area so that any spilled etching cream won't make you have to stop what you're doing to clean it up. The window of working with this product is small.
With your gloves on, pour out the etching cream carefully on to the glass and spread evenly (with as few strokes as possible, see explanation below) with the paintbrush. You should have a nice even coating on the glass.
The directions say to leave it on for only a minute, I have heard some crafters say to leave it on for up to 1/2 hour! I had it on for about 5-6 minutes. This is right before I washed it off.


Be sure that you are not rinsing this out in a wash basin that is plastic. It should be a stainless steel sink. Run lukewarm water over it. If you want (with gloves still on) use some paper towel to rub off the etching cream. If the punch outs fall off, don't worry about it, you're rinsing off the cream anyway. (I like to run the water for a minute or more longer to make sure none of the cream residue is in the sink and flushed from the pipes.)
Remove any left over punch outs, dry off the glass and clean up your work area. Here is the glass.


I am not sure how I feel about it right now. The next step is to add the permanent inks. The directions did say that if you work with a large area, the imperfections of the glass might show thorough. They also don't tell you that the brush strokes do affect how the finished product looks, so keep that in mind. Try to use strokes in the same direction and don't go over already touched areas if possible.
I think the negative space shouldn't have been the flowers, the reverse might have looked better. We'll see how it "cleans up" with the inks. Off I go.
Downward Spiral...But in a Good Way!
There are many items on my store. It is varied and it has to deal with all the ideas that I have that want to come out. Each trip to the craft store brings an excitement to try new mediums for my creative expression. I don't know if I should try to stop being a Jack of all trades and just be Master of one...or two!
It all started with scrapbooking. Anyone who has ever gotten into that hobby knows how expensive it can be and every new thing is a must buy! Then I began sketching and drawing because of the inks and chalks left over from random scrapbooking projects. Then I wanted to express my illustrations in a more 3d manner and I purchased polymer clay... That spawned other purchases I won't get into here. Needless to say, I have enough in my studio/workspace that I was able to design and create my wedding invitations! That's a lot of material lying around!
Anywhoo, to bring this back to my store, here are some of my creations...


 These are all polymer clay creations. The first one is a lock charm that actually works in 'nondreaded' hair too. (Just make a braid and wrap it in!) Check out the store for other designs.
I will list promos and creative ideas that I don't want in the store here, so keep an eye out. My Message in a Bottle invitations were a hit and want to set up a tutorial along with some free templates. Keep checking back.
It all started with scrapbooking. Anyone who has ever gotten into that hobby knows how expensive it can be and every new thing is a must buy! Then I began sketching and drawing because of the inks and chalks left over from random scrapbooking projects. Then I wanted to express my illustrations in a more 3d manner and I purchased polymer clay... That spawned other purchases I won't get into here. Needless to say, I have enough in my studio/workspace that I was able to design and create my wedding invitations! That's a lot of material lying around!
Anywhoo, to bring this back to my store, here are some of my creations...


I will list promos and creative ideas that I don't want in the store here, so keep an eye out. My Message in a Bottle invitations were a hit and want to set up a tutorial along with some free templates. Keep checking back.
Subscribe to:
Posts (Atom)